Refinishing a Deck Part 3: Tools: Brush vs Roller vs Sprayer
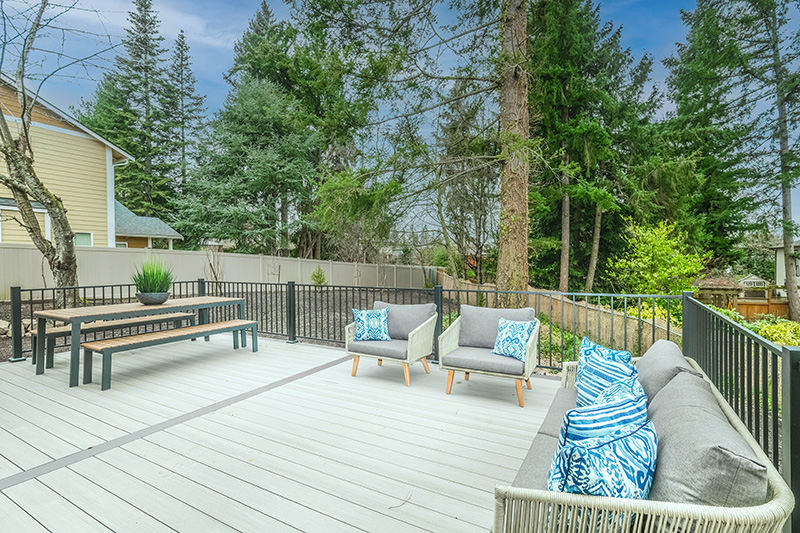
Now that you have decided between painting or staining, now is the time to get ready to get started. In order to coat your deck appropriately, you will need to have the right deck refinishing tools to paint or stain your deck. You have three options which include using a brush, a roller, and a sprayer. They each have their own advantages and disadvantages, so you will want to take the time to determine what works for you and your deck.
Sprayer
A sprayer is a fast way to paint or stain your deck. If you are in a hurry, you can pain your deck in just a few minutes or so, depending on the size. In just one coat, you will have decent coverage. You will also get a smooth finish that is free from brush marks or roller marks. If you have hard-to-reach areas and areas that have narrow gaps, you will easily be able to reach them with your sprayer.
However, there are a few downsides that come to using a sprayer for your paint or stain. Using a sprayer will require you to have a longer time to prep to do the painting or staining, and clean-up will take a lot longer than you expect. In some cases, you will find that you have uneven coverage, especially if your deck is not square and level. If the day you choose to stain or paint is windy, you could end up with poor coverage, and you can have paint and stain on places that you do not want. Another downside to using a sprayer is that if you do not have the experience in using the sprayer, you may find it difficult to use. It takes practice to master a sprayer, so you cannot expect to just go out and start spraying your deck and for it to look good. You may find that you have over sprays, drips, and runs. You may find that you have some areas that have heavy applications and others that are not covered enough. You may also find that you are using more paint or stain than you would in rolling or brushing.
Brushing
Brushing paint or stain is the traditional way to apply these to your deck. Brushing can help to ensure that you get everything painted well and that you have uniform coverage. You will have the best adhesion to the areas that are stained or painted, and you control where the paint or stain goes. Brushing also allows you to get into tight corners with your brush tip. In addition, you can paint or stain in straight lines on your deck.
With that being said, brush painting does have its downsides. If you are in a hurry and want your deck done fast, brush painting or staining is not for you. This is especially true if you have a large deck. Painting or staining your deck with brushing generally requires at least two coats, more so if you have cracks or other issues with your deck. Another issue with brushing is that it may show brush marks. If you do not want to see brush marks on your wood, you will need to choose another option.
Roller
When it comes to deck refinishing, you may decide that you want to choose a roller to roll out the paint or stain. Rolling can allow you to pain at least two times faster than painting with a brush. You will also find that you can paint hard-to-reach areas, especially those tall areas on your deck. Rollers are very inexpensive to get, and they offer very good coverage on your deck, no matter if you are using stain or paint. The downside to rolling your deck is that if you have uneven surfaces, it will not cover well. You may have to go over your deck multiple times. It may also leave roller marks. If you want to save paint or stain, rolling will not be for you as it uses more than what you would with brushing. When rolling the deck, you will also have to watch out for the roller snagging on the edge of the wood of the deck. This can lead to your roller being torn up and it taking you more time to stain or paint your deck.
So how do you choose which deck refinishing tools to use? You can combine all the methods to use on your deck. For example, if you have small areas on your deck, like the posts, consider using a brush. If you have a covered deck, try using the roller to reach those high spaces. For your wide surfaces, like the main surface of the deck, consider using the sprayer. This will allow you to make sure that your whole deck is covered with the paint or stain of your choosing.
If you need help painting or staining your deck in the Richmond area, please give Hetrick Painting a call. They are family-owned and operated and are happy to offer the best customer service in the area. Never paint or stain your deck alone if you are uncomfortable with the process. Hetrick Painting will work with you to ensure that your deck looks amazing.
Why you should hire a pro for those cabinets
Kitchen remodeling is a massive and expensive project for any homeowner. The biggest chunk of kitchen remodel cost goes to the kitchen cabinet. Installing new cabinetry require a significant budget.
Fortunately, you don’t have to install new cabinetry if you are looking to renovate your kitchen as you can achieve a fresh, new look by repainting your cabinets.
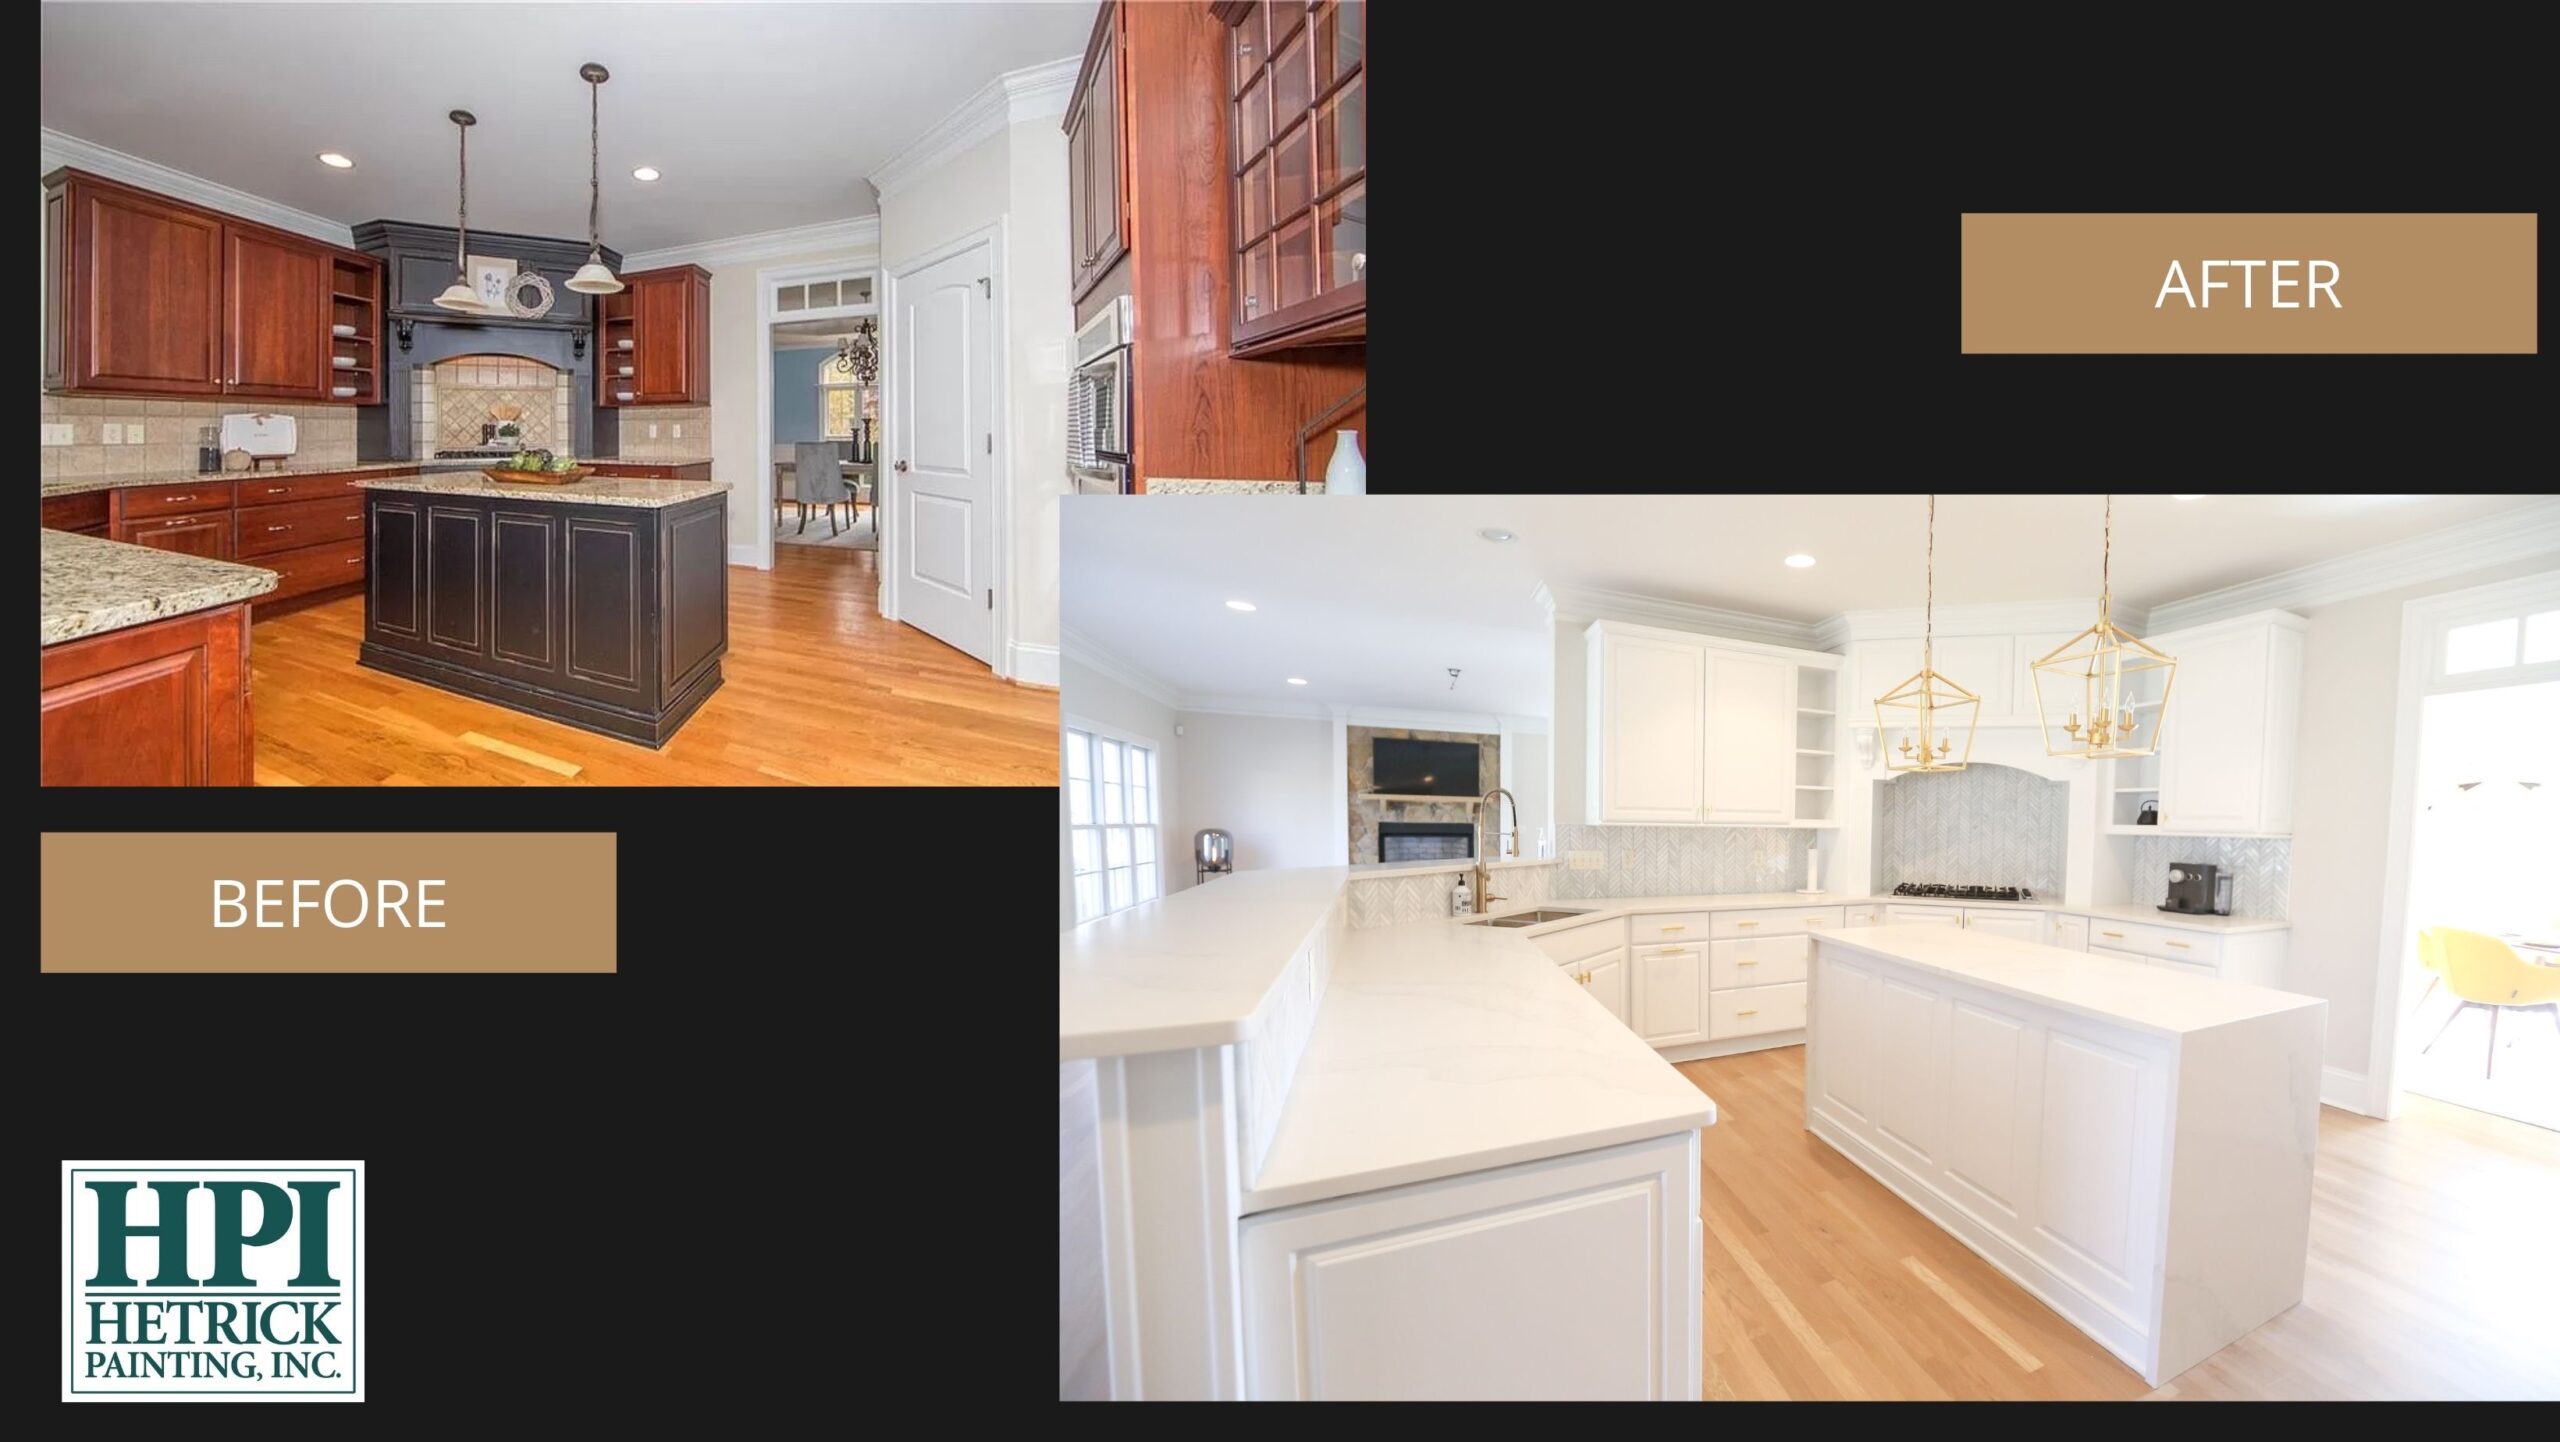
You will be amazed by what a fresh coat of paint can transform the appearance of your kitchen. If you want to revive your dark, faded cabinets, consider repainting them to give them a bright, inviting appearance.
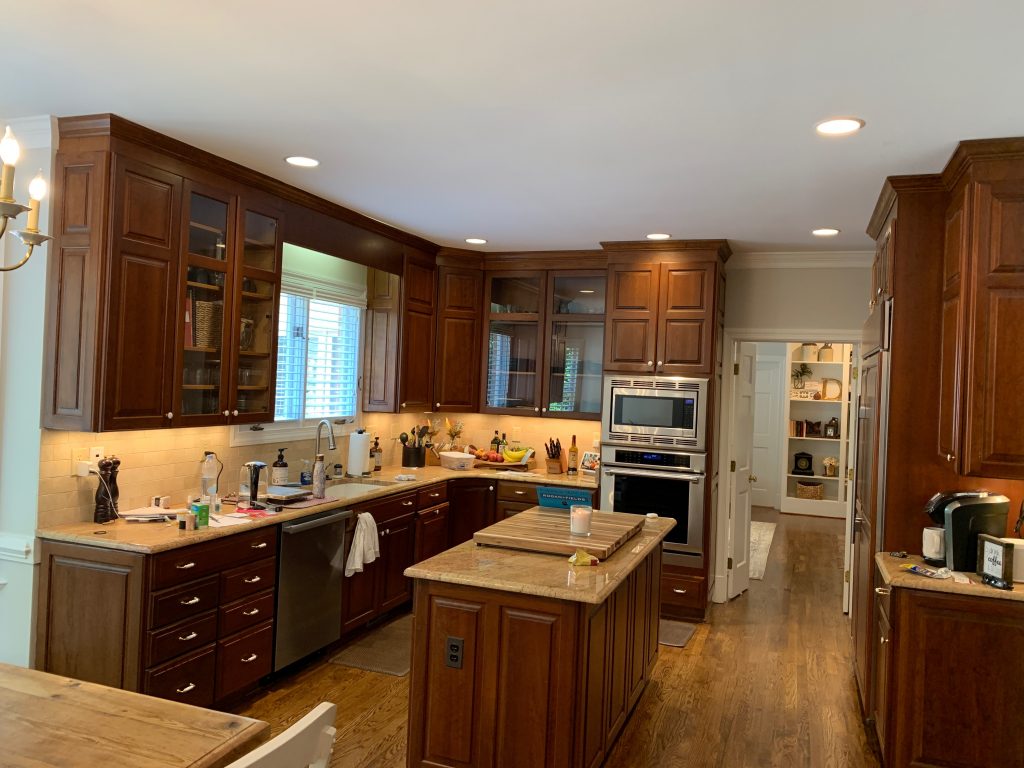
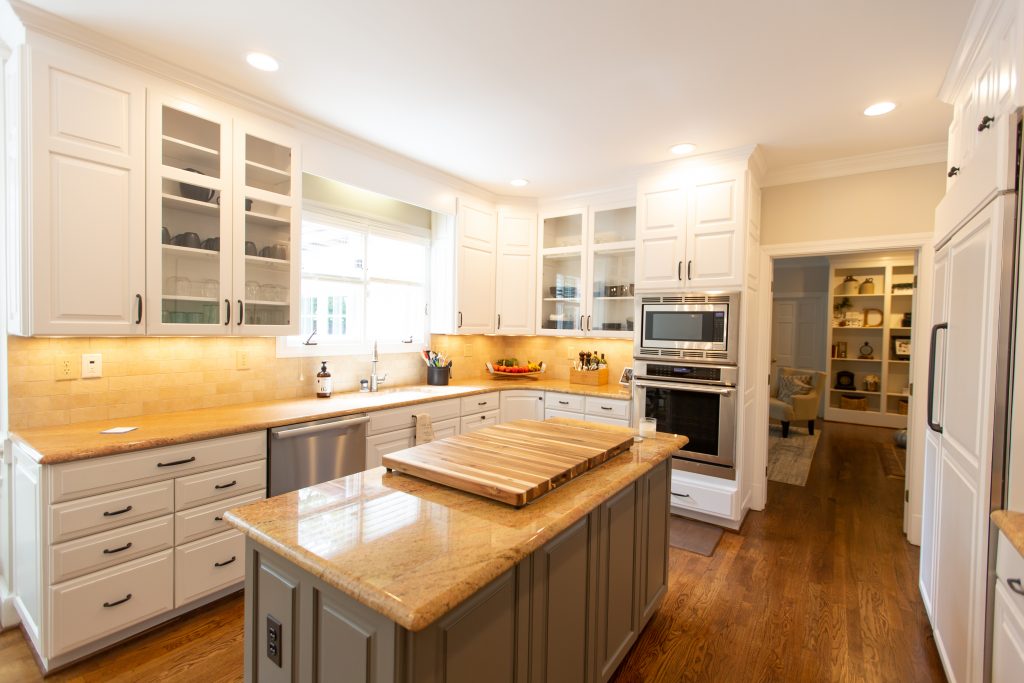
A pro is skilled in painting application, plus they have the additional advantage of being able to use high quality tools! When the project is finished, you will have clean lines with no bleeding edges. You won't find stray drips and you will know that the cabinets have been properly finished for lasting durability.
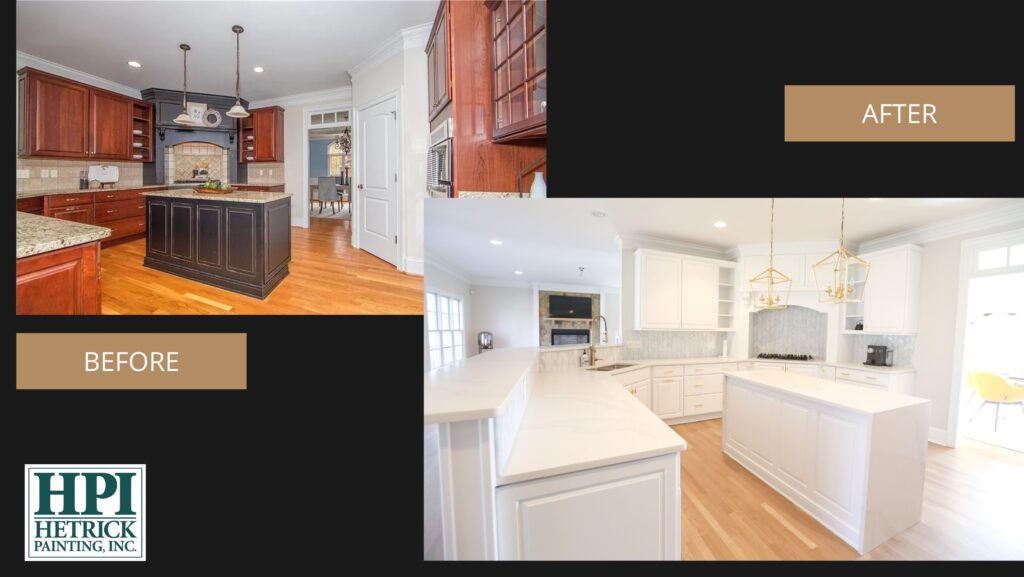
- Professionals will get the job done right the first time
Because of their skills and experience, professionals know what they are doing. They have done the work countless times before, and thus have the needed experience to complete the work on time and do it perfectly. Besides, hiring a pro means you will be saved the hassles and headaches that come with painting.
- Painting equipment comes at a cost
As mentioned above, if your cabinet has a complex design, then you will need a sprayer to do the work. Quality paint sprayers are pricy and can range from $1000 to $8000. And although you can rent one for the project, professional painters know how to use paint sprayers the right way to ensure a smooth, flawless finish.
- Professional painters are efficient and fast
It can take weeks for you to finish painting your cabinets, but if you hire the right professionals, they can do the work in 2-3 days. Why do it yourself then?
- They provide warranties for their work
When you hire reputable and reliable professionals, you will get to enjoy a warranty for their work. Therefore, in case anything goes wrong within the warranty period, it can get fixed without you having to incur any cost.
- High-quality results
Professionals are keen on details, and thus will deliver quality results. They will prepare your cabinets as required and use a protective finish to ensure your kitchen cabinets look flawless and last longer.
If you decide to leave this job to the pros, how can you identify the right professionals? There are countless contractors to choose from. How do you know who to hire?
To help you with your search, here are a few questions to ask before hiring professional painting services in Murrieta and Temecula CA;
Questions to Ask a Professional Painters to Know the Best One for Your Kitchen Cabinet Painting Job
Q1- Are Cabinets Your Specialty?
Painting cabinets require a lot of experience and special skills for them to turn out looking great and flawless. Not all painters can tackle this job efficiently, which is why you need to know if a painter has the experience and skills needed to paint and refinish your cabinets.
Q2- What is your painting process?
This question will help reveal if the contractor knows what they are doing. To paint cabinets, you have to clean, sand, and prime. Adding a primer layer will give a paint long-lasting finish.
Q3- Can I see several samples of your work?
A professional painting contractor who has been in the cabinet painting job for some time will not shy away from showing you their past work. This can be in the form of sample boards or pictures. By looking at the pictures, you will know if a painter is skilled and keen to details. It can also serve as the basis for your comparison.
Q4- Are you insured?
While this may not seem a bigger issue, especially with cabinet painting, accidents do occur, and it is important to know that you are not liable to pay for the damages and injuries that occur during the painting process. Therefore, verify that your contractor has obtained liability insurance to keep your assets protected.
Q5- Do you offer warranties? What does it cover?
When you hire a contractor for a cabinet painting job, you will need some assurances in the form of warranties. Knowing how long the warranty period lasts and what it covers will give you an idea of the quality of work a contractor does. However, be wary of contractors who give unrealistic warranties such as 10-year or 20-year warranty period on the painting job. Often, 1-year warranties are okay since most failures will begin to show within the first year.
As you can see, hiring a professional pays off, especially when it comes to the quality of work and efficiency. It may cost you more money, but it will save you the hassles and headaches that come with painting work.
Refinishing a Deck Part 2: Painting vs Staining
Now that you have finished the first part of your refinishing deck project, you will now want to consider whether or not you will paint or stain your deck. There are several different factors to consider, and both options have their pros and cons. You will need to look at several different factors, including longevity, your personal preferences, color choices, maintenance, and how easy the application will be.
The Pros Of Painting Your Deck
If you want to paint your deck, there are several pros, and they include:
- Color options. When it comes to deck painting, you have unlimited color options. If you decide to refinish your deck and paint it to match the exterior of your home, you can do so. You can also paint it a color that would compliment the color of your house. The choices are endless.
- Hiding flaws. When you use paint on your deck, you can hide some of the flaws. This is especially true if you have an older deck that has a lot of weathering. You can fill in a wide variety of spaces and make the deck look good as new.
- Low maintenance. A painted deck should not need to be painted frequently. If the paint job was done right and the right kind of paint was used, your deck should not need to be repainted for over ten years.
The Cons of Deck Painting
There are several disadvantages to deck painting, and they include:
- Loss of beauty. When you paint your deck, you will lose the beauty of the wood. Stain can enhance these features, so if you like to see the wood grain and the neat imperfections in the wood, paint is not the way to go.
- Moisture trapping. When you paint your deck, moisture can get trapped on the wood. When it rains, there will be water pooling on your deck. In some cases, this can lead to moisture getting up under the wood, which will cause your paint to peel and chip.
- You will always have to paint. Once you paint your deck, you will always have to paint it unless you go through and sand all the paint off your deck.
The Pros of Staining Your Deck
If you do not like the sound of painting, your other option is staining your deck. The benefits of staining your deck include:
- Stain options. When it comes to stain, there are many different options. If you would prefer a clear coat, you can do that, or if you would rather have an option that is more paint-like and a certain color, you can find that as well.
- Highlighting. When it comes to refinishing your deck, and you have wood like a redwood or cedar, you can enhance the characteristics of the wood with a natural look.
- Easier to apply. When it comes to painting a deck, there are many steps. Stain is very easy to apply, and you will not have to use as many coats.
- Opacity. You can easily control the opacity when it comes to deck stain. You can add as many or as few coats as you want.
The Cons of Staining Your Deck
Here are a few reasons why you might decide to not stain your deck:
- Reapplication. When you stain your deck, you need to do so every two to three years. If you live in an area where you have constant weather issues, you may have to stain it more frequently than that.
- Cracks. If you have cracks on your deck staining, it will not help to fill in the cracks.
- Flaws. If your deck is weathered, you will want to hide some of the flaws in it. It is impossible to hide flaws when you are deck refinishing with stain. The stain simply is not thick enough to hide the imperfections.
How Do You Choose
Now that you know the pros and cons of each option, you will need to make a decision. Take a look at your deck to determine if you want to use deck refinishing paint or deck refinishing stain. You will want to consider what will look great and add value to your home, and you will want to consider what kind of budget you have. Both paint and stain can be expensive depending on how much you need, the brand that you use, and the type that you get. If you are still not sure on what you should do, consider looking at pictures online to get a good idea as to what each option would look like. When you are looking at painting your deck, look at deck pictures that are in similar colors to what you are considering. You will also want to look at the colors offered with stain to see what you want to choose. Take your time and choose the best option for your deck.
Once you have chosen whether or not you are going to paint or stain your deck, you will need to prepare your deck and start painting or staining. However, if you do not feel comfortable doing this yourself and you want to make the deck look amazing, call Hetrick Painting today. They are family-owned and operated and have many years of experience in painting and staining decks. If you are still undecided on painting or staining, they can look at your deck and help you to choose the best option for it.
Refinishing a Deck Part 1: How to Resurface Cracked & Splintered Wood Decks
If your deck is cracked and splintered, you will want to refinish your deck as soon as possible. A cracked and splintered deck is a dangerous one. When there are cracks, rain and debris can get down in the wood and cause it to rot and be unsafe. Splinters can also become embedded in pets and people, so you will want to learn how to refinish your deck quickly. To fix splintered and cracked wood, you will have to sand it and then stain or paint it to ensure that the same issues do not happen again. Proper deck maintenance is imperative to make sure that your deck lasts for many years.
Putting a great sanding job on your wood deck can bring it back to life. However, in some cases, you may find that your deck still looks lackluster. There is a solution called deck restoration coatings that will fill in the cracks in your deck and create a surface that is both weather-resistant and smooth.
You may think about just cutting off the worn boards and getting new ones, but this can be very expensive, especially with the cost of lumber these days. So if you want to save money, you need to learn how to preserve your deck or have someone come out and do it for you.
Power Washing Your Deck
Your first step to refinishing your deck is to go ahead, and power wash it. You might think that this will worsen the problem if your deck is already splintered, but the truth is that there is no better way to clean it off. If you do not clean your deck off before attempting to refinish your deck, you may clog up your sander and miss areas where the wood is splintering. For example, if you live near pine trees, their sap may be on your deck. The sap may make your sander not work well, and it may also cover areas where splintering may occur. Pressure wash your deck thoroughly. You do not have to use a strong setting on your pressure washer, just enough to clean it well. After you have pressure washed your deck, you will need to let it dry for three to four days before you sand.
Sanding the Deck
Once the deck has dried, you are now ready to sand the deck. You can use a belt sander for refinishing, or if you want to use one of the best deck refinishing tools, you will get a flooring orbital sander. Generally, you can find one of these at your local equipment rental store. You will also want to make sure that you have plenty of sandpaper on hand. You will want to have 120 grit sandpaper unless you have a strong finish on your deck. If you have a strong finish, you will need 100 grit sandpaper.
Once you have all your deck refinishing tools gathered, you will want to go through your deck and make sure that you have hammered down any nails that may be sticking up. If there are any nails, they could tear your sandpaper and cause you to have to replace the paper multiple times. Once you have done this, you are now ready to sand the wood. You should try to sand along the wood grain no matter what kind of sander you have. Generally, one pass on each board should be sufficient. If you are seeing that some of the wood is still splintered or looks rough, go over it again. You should make sure that the last pass you make on the wood is with 120 grit sandpaper.
Protecting Your Deck
After you have finished sanding, you will want to clean the deck again. Sweep it first, and then spray it off with a water hose or your pressure washer. You will need to let it dry for a couple of days to ensure that when you stain it or paint it, the wood will accept it well. After the deck has dried, you will want to determine what you want to do as far as painting or staining. Both are great options, and will all depend on your personal preference, the wood you are using, and what look you want.
You may also choose to do a restoration coating, but it is important to note that restoration coatings only cover about twenty square feet per gallon. To fully protect your deck, you will want to apply two coats, so you will want to make sure that you purchase enough to do that. You will have to apply one coat and then wait another twenty-four hours before applying another coat, and you will need to wait two days before you can use your deck. With this information, when it comes to deck restoration, you will need to take your time to determine whether or not you would rather paint or stain your old deck.
If you take a look at your deck and decide that refinishing it is too much hassle or you do not want to take on a refinishing deck project at the moment, consider calling Hetrick Painting today. They can come out and refinish your old deck in no time and ensure that it looks great and is well protected from the elements.
Tricks and Tips for Painting Your Bathroom in 2021 - Part 1
One of the quickest ways to give a house or business a refreshing feel is with a bathroom paint job. Every year paint and design experts offer a variety of pointers for getting the best results. From the best paint colors to selecting the right accessories, dozens of options can improve bathrooms on any budget. Here are the top eight ideas for making small rooms larger and getting the open, airy feeling that guests want.
Clear the clutter and deep clean first
The first thing any project needs is a clean slate. Clearing out all decorations and stripping the space down to the walls is essential for painting. A clean surface will accept the paint more readily. For the smoothest surface, light sanding to prep the walls before applying primer or combination paint is essential. Removing built-in shelves or wall units makes it easier to paint the walls.
Making repairs first will eliminate paint touchups
After removing the old materials, flaws and problems show up in all their glory. Fixing these issues is critical. Conversely, applying joint compound, then sanding small cracks or dents creates smoother walls. Replacing faucet washers or broken handles now will prevent potential water damage later.
Select a paint scheme that fits
Picking the style that suits the rest of the building is always a straightforward route. Blending in is one of the fastest ways to tie the bathroom into any home design. Others may want to redefine the space by making the room a retreat to relax and unwind after a long day. Perhaps the room is therapy for someone going through a lot of stress. Businesses may choose a color pattern that fits the company logo or trademark colors. There are many reasons to pick a particular color or pattern.
Buy paint from a trusted supplier
Going to a paint store or hardware store with a paint center is one of the best ways to access a variety of colors and finishes. Sherwin Williams interior paint color is an affordable, quality product that many people trust to use in their bathrooms. Some of the most popular bathroom colors in 2021, according to HGTV, are rose tones like Sherwin Williams 6300 series paints, and gray tones like SW 6255 Morning Fog. Going neutral is always preferential in a home or business for sale. SW 7638 Jogging Path is a comforting beige that will pop with the right navy blue accents.
Keep bathroom colors uniform
To get the most size increase out of any bathroom, it is important to avoid the white ceilings. Painting the walls and ceiling a different tone breaks up the color and minimizes the feeling of the space. Using various shades of the same color is a great way to create an accent wall that does not overpower the room or make it feel smaller. For example, an overall rose color in Sherwin Williams interior paint color 6289 Delightful with a shower accent wall in a 6292 Berry Bush tone will create a delightful yet cohesive space.
Aqua and light greens are soothing options
Many people use the ocean to give them bathroom inspiration. Interior paint colors that use a variety of blues and greens can be calming. With the hectic lifestyle everyone is experiencing, creating a Zen space with Sherwin Williams 9036 Retro Mint is enticing. Mixing blues and greens with opulent pearl shades can create quite an underwater feeling. There are many ways to incorporate blissful beach hues and vivid ocean themes.
Spend extra time on the trim
A handheld sander will be a lifesaver for prepping wood trim. Use quality tape and sheeting materials to prevent paint bleeding. Always tape off every piece of trim. Use a one-inch brush to get in the corners and crevices of crown molding and door trim.
Update hardware to a modern design
No one wants to walk into a nice, fresh bathroom and see outdated faucets. Clear handles with permanent watermarks are not appealing. Older metals lose their sheen and luster.
A quick way to make the room look bigger is by adding slimmer models. Recessed handles work best for small bathrooms. Magnetic closers are also helpful.
Better lighting improves any room
A brighter room is bigger. More natural light is always best. An interior bathroom paint with a high sheen will bounce light around the room better. New overhead lights or sconces can brighten up small rooms as well as adding a large mirror.
Stick with a minimalist design for a more open design
- Too many decorations make a room feel smaller
- Use bold colors to provide color pops
- Pick convertible items and hidden storage to keep the room clutter-free
Increasing bathroom spaces start with a fresh coat of paint. The right details and colors will make the room feel bigger. The best updates include new fixtures and lights. For amazing results, stick with light tones and similar colors.
8 Tips for Painting Cabinets
One affordable way to make a home or business feel clean and fresh is to give storage cabinets a new coat of paint. Home improvement guru, Bob Vila, says painting is an incredible alternative to cabinet replacement. With the right preparation and curing, property owners can add equity and create a fresh look with a cabinet overhaul.
Consider the purpose of the paint
People who are considering selling may appreciate a paint and primer combination. These products will save time. Valspar Ultra Premium White is one option for kitchen or bathroom cabinets. When upgrading a property or overhauling a lot of cabinetry, it is less expensive to go with separate paint and primer products. Home improvement stores and paint shops will tint a less expensive primer any color. For waterproofing, knowing that the combination paints is thicker helps.
Gather supplies for painting kitchen cabinets before starting the job
Nothing is more annoying than being in the middle of a project and running out of something. Planning for surprises and overages can minimize the need to stop and start. Painting everything at the same time is preferable. There will be several paint sessions, but finishing every layer, once in progress, will ensure more even coats.
DIY Network says to go with fabric drop cloths instead of plastic because they are easy to move from one wall or project to the next. Paint trays are the opposite. They are easily replaceable, and buying several at once will come in handy. Painter’s tape is another necessity that will keep the margins clean and protect glass and other materials while painting. Purchasing separate priming and paint rollers and brushes will make cleaning easier.
Take extra care when prepping to paint
Taping off cabinet inserts and glass panels will keep over spray off of these items during the project. Using quality tape will minimize paint bleed. A painter’s tape will lift off the surface easily when the project is over. Masking tape will stick and tear, leaving a sticky residue that needs cleaning. Using small plastic sheets to cover larger surfaces will cut down on the prep work and use fewer painter’s tape.
How to apply painters tape for painting cabinets
For tight corners in the cabinets, painter’s tape ensures no paint seeps through. When spraying the cabinets, the tape is a must. When painting by hand, cabinet doors with recessed panels may be easier to do with a small brush and a steady hand. To apply tape to the corner of a cabinet, it may be helpful to work from the middle of the corner and back in each direction. Cutting the tape is acceptable with a quarter-inch overlap.
Use an electric sander
Before painting any surface, it is important to finish the prep by sanding it. Starting with a small number grit sandpaper, go over each cabinet door and base. Using a larger grain paper like 80 grit to start is ideal. Then, sand the doors again with 120 grit sandpaper. Keep a 140 or higher grit sandpaper to scuff the surface lightly between paint, varnish, stain, and primer applications.
Know how to paint cabinets for a smooth, appealing finish
Coat the surfaces in thin layers of paint to minimize streaks, drips, and blobs. Give each coating at least 24 hours to dry before applying the next coat. If the weather is humid or rainy, then adding extra drying time may be necessary. Using a fan or central air system with a dehumidifier will also speed up the process.
Always paint the face of the cabinets last
There is no need for flipping a second time when you paint the bottoms of the cabinet and the insides first. When these parts are dry, then you can turn them over once to paint the fronts. Even with multiple layers and polyurethane, completing the inside and base first will prevent the need to turn over the cabinets several times.
Never skip the top coat
Just like a top coat of clear nail polish sets in the color and protects the finish for fingernails, a cover coat protects the paint on cabinets. This top layer adds sheen and gloss to kitchen cabinets for a bright atmosphere and clean design. This extra protection also prevents water and stains from damaging the paint.
Give the cabinets time to dry
It is best to give cabinets a full two weeks to cure. Letting the paint harden for this long will prevent door slaps and bangs from chipping the surface. The hardware will not scratch the paint by waiting this long for the paint to set.
Here are a few bonus tips for painting cabinets. Ask a friend to wear a pair of gloves and help hang the doors to the kitchen or bathroom when they are ready. Always remember to clean the drawer pulls and handles. This tip is especially helpful when painting kitchen cabinets white. Finally, put the handles back before rehanging the doors.
References:
https://www.bobvila.com/articles/painting-laminate-cabinets/#:~:text=Prime%20your%20laminate%20cabinets%20for,%2C%20paint%20selection%2C%20and%20application.&text=Short%20of%20committing%20to%20a,eye%2Dcatching%2C%20modern%20cabinetry.
https://www.diynetwork.com/made-and-remade/learn-it/25-tips-for-painting-kitchen-cabinets
https://www.thespruce.com/self-priming-paint-real-or-scam-1822383
Five Tips and Tricks for Painting Interior Doors Like the Professionals
Every project starts the same way whether you are working on a car, planting a garden, or painting part of the house. Finding out the best ways to do the job and what supplies you need are at the top of the list. Then, learning how to get the best results will make the job more efficient. Knowing the most popular interior colors can be a fun way to liven up the mood in your home. Here are five excellent ways to help you know how to paint interior doors.
Picking the best colors for 2021
Believe it or not, gray interior paint is one of the most popular colors for doors this season. The color is a bit deeper than neutral tones, but still safe enough to add value and character to the home. If bold is more your style, then get ready for a change.
Spring colors are all the rage this year. People are ready to bring the outside in to give them a whole new feeling at home. With families staying in longer than ever, a vibrant color can switch up the entire vibe in the house. Better Homes and Gardens says the top Pantone colors include paprika and teal. Valspar is offering a lighter list of hues for anyone afraid to go too bold, selecting apricot and light gray as top choices.
Get the right supplies
Creating the best look means gathering the necessary equipment for the job, no matter how large or small the task. For painting interior doors, it is best to use a roller and a brush to get an even coat. Other helpful items will include sandpaper, drop cloths, and paint trays. You will want a 220 grit sandpaper to get the right finish for applying paint. Painters tape is a must. You will need to cover the hinges and trim unless you remove the door. Finally, a wood filling agent will even out scratches, holes, and minor damage.
Decide whether to prime the doors
You can avoid this step in two cases. If you have latex paint you are putting on a door with an old layer of latex, then you do not have to prime it. The same goes for doors with an original primer coating. Otherwise, priming the door is the best way to get an even, solid coat that lasts for years. Apply one coat of primer using the instructions below in the how to paint interior doors section. Sand with a 220 grit sandpaper and lightly go over the entire surface before applying the first layer of paint.
Remove the hardware
No law says you have to leave the doorknob on the door when you paint. Most professionals remove this item to cut down the time they spend prepping the door. Plus, you ensure the paint gets around the doorknob opening better. You can take the door off the hinges and paint it that way if it is easier to work using a flat surface.
How to paint interior doors
It is important to know where to start painting. If the door is one solid piece from top to bottom, then working from the edges in is the best method to get an even coat. For panel doors, it is better to cover the panels first, then work out to the edges. If you want to use an interior paint sprayer, then we suggest taking the doors off for more convenient access to both sides.
Solid doors
Always go from the inside edge of the door when it is hanging. Use a brush to get around the hinges. To prevent paint accidents, tape up the hinges before you start working. Expert painters say to wipe off the brush well to stop any drips and splatters.
Painting interior doors is a quick job with the right preparation and painting techniques. Cover the top edge and work to the sides of the door before finishing with the bottom edge. To get the best coverage on the main part, use the roller horizontally first, and then go vertically. Work from top to bottom to get the best effect.
Panel doors
For these doors, it is best to work from the top down. Paint the sides of the panel and the stiles with a brush and use a roller to cover the primary surface. Paint the vertical stiles first before moving to the horizontal ones as you work down the door. Finish the door by painting the edges the same way as you would the solid door edges.
Use these interior paint ideas to get the best results for your inside doors. Let the door dry until it is not tacky. Then, you can sand and add a second coat if you need it. Finally, reattach any hardware you need, and rehang if necessary. Painting interior doors can give you a new look and change the mood.
References:
https://www.bhg.com/decorating/color/paint/2021-color-of-the-year/
https://www.paintzen.com/blog/pro-tips-for-painting-interior-doors
This season, proceeds from each job will go to Lisa Armstrong & Family....
Lisa grew up as the oldest of four children, bouncing around from Ohio to Jackson, Mississippi. After graduating from Mississippi College with a degree in nutrition and dietetics. She and her husband Gary decided to start their new life and family in Richmond, VA. Lisa spent the next thirty two years working for the Virginia Department of Health; supervising WIC and food/nutrition services, while also returning to school to become a registered dietician. In her free time she loved to pick a direction to travel in search of new places to find antiques, becoming an accomplished artist, and even giving serious thought to starting her own baking business using exclusively antique chocolate molds. In the fall of 2017 tragedy struck. While Lisa was recovering from emergency abdominal surgery, she noticed her right leg was starting to ache and turn red. After seeing an orthopedic, it was discovered she had a dangerous infection of serratia in her right knee/leg, the infection is believed to have originated during her stay in the hospital while recovering from the abdominal surgery. Lisa was rushed to the hospital to have her first surgery to try and clear out the infection from her leg. The clean-out was done, but after two months of antibiotics it was discovered the infection was back with a vengeance, spreading down her leg at a feverish pace. Lisa was back in the operating room in March 2018. After the surgery Lisa spent the next six months taking antibiotics that destroyed her appetite, and doing physical therapy weekly to try and regain limited use of her leg. Unfortunately, during a check-up with her orthopedic it was revealed through blood tests that the infection had hid itself in one of the crevices behind her knee. Surgery was scheduled to not only try and clean out the infection but to also try and address the issue of bone degeneration in her tibia and femur that the infection had caused. Everything seemed to be going well until March of this year. A bubble formed on the side of her calf muscle almost overnight. The Dr. informed Lisa it was apparent that the infection had not only returned, but was actually dripping down her leg and forming a pocket around her calf muscle.

Due to the covid-19 restrictions, Lisa had no choice but to try and take antibiotics to hold the infection from spreading any further until the hospital was able to perform one last surgery to try and not only save Lisa’s leg, but her life as well. During this period of time, Lisa dropped to seventy-three pounds and was too weak to even get out of the bed. She continued to have iron-fusions to address her anemia, and blood-transfusions to address the other deficiencies that were happening inside of her body. On the outside, Lisa was a shell of her former self and had lost all use of her right leg. Finally on september 24th, our prayers were answered. The Dr. decided one last attempt would be made to clear Lisa’s leg of the infection, and to address the curvature of her tibia caused by massive bone loss from the infection. The only other alternative was amputation because the Dr. did not want the infection to travel to other parts of her body, and on September 24th she was back in the OR for this last attempt. Lisa awoke to find a 24inch titanium rod had been placed from the quad all the way to the calf to keep her leg straight for the next two years, which she was non to excited about, but given the alternative, we’ll take it! After some trial and error, they found an antibiotic that worked well with Lisa’s system and she was able to return home. Lisa has had to continue with the iron fusions weekly, one of the many permanent effects from the infection is Lisa will be anemic for the remainder of her life, & other than PT bedridden for the next 2 yrs.
Her son, Chris has been her fulltime caretaker since the begining of the infection, & has been unable to return to work because taking care of Lisa has been a 24/7 job, which he gladly does. Her husband Gary remains the sole source of income in the household. The family has exhausted their savings and taken out numerous loans over the course of the last 2 1/2 years to cover Lisa's growing list of medical expenses that the insurance company would not cover. Unfortunately, with only one source of income, trying to catch up and remain current on these obligations has become impossible. We thank you for taking the time to learn about Lisa's situation, & we appreciate your thoughts, prayers, & financial support! God Bless!!
To give you can go through Lisa's GoFundMe Page directly: https://www.gofundme.com/f/HelpLisaandGaryGoal
Or you can donate directly through our company, just mention it to us at the end of your job!
Thank you so much for your continued support to our community. When you work with Hetrick Painting, you're directly helping a local family in need. Thank you
Deck Staining- When is it time to get it done or reapply?
Water takes a toll on a wood deck’s finish, whether it’s pounding rain or piles of snow. You can tell whether your deck stain is still protecting the wood if it repels water. If it doesn’t, it’s time to stain again.
Consumer Reports tests dozens of solid, semitransparent, and clear stains to find out which last longest. The worst look awful in a year. The best should last three to five years.
How CR Tests Wood Stains
CR's test engineers apply two coats of stain to pine boards, and place them on the roof of our headquarters in Yonkers, N.Y. We face the boards south and angled down, like a roof, to intensify the effects of the sun and weather for up to three years.
One year of testing tells you how a stain will do one year on your deck, or about three years of weathering on your home's vertical surfaces (siding or fences) as you'll see in our wood stain ratings.
For an aging deck with splintered wood, applying a solid stain may buy you a few more years. The stain will hold the splinters in place and fill in small cracks. Before you stain, do a safety inspection using the 10-point checklist from the North American Decking and Railing Association. Then follow these tips for staining your deck from the paint pros at Consumer Reports.
1. Check the Forecast
Wood stain won’t adhere well to damp wood and can crack and peel. Apply stain to dry wood when it hasn’t rained for several days and the forecast calls for at least two days of dry weather between 50° F and 90° F. Low to average humidity promotes faster drying. Staining in direct sunlight can also be a problem. The stain will dry too fast before the wood is able to absorb it.
2. Prep the Surface
The wood needs to be free of dirt and stains for the stain to adhere properly. Start by sanding splintered spots, wearing a safety mask to avoid inhaling the dust. Sweep the deck and use a putty knife to clean between the boards. Clean the wood by applying a deck cleaner. Or use a pressure washer, but if you do, the wood will need two to three days to dry.
For a deck built before 2004 that’s flaking, we suggest hiring a pro equipped to safely remove the finish, dust, and debris. That’s because before 2004, most decks were made of lumber pressure-treated with chromated copper arsenate (CCA) to fight rot and insects. Sanding this wood releases the toxic arsenic into the air and surrounding soil.
3. Use the Right Brushes
Synthetic brushes are ideal for working a water-based stain into the wood. Natural bristles, on the other hand, are hollow and can lose their rigidity, going limp as they absorb the water in the finish. Prefer a roller? Use one with a nap that’s ¼ inch or shorter. That lets you apply a thin layer of stain that adheres to wood without pooling.
4. Match the Stain Type to Your Wood
Each type of stain has its advantages, and the type of stain already on your deck will affect your choice. “If the wood is coated with a solid stain, you can’t apply a semitransparent or clear stain over it,” says Rico De Paz, who runs our tests of stains and paints. Solid stain plugs up the wood pores, preventing a semitransparent or clear stain from soaking into the wood. “But a solid stain can be applied over any type of stain.”
To learn more about the different types of wood stains and how long you can expect them to look good, read Benjamin Moore's List of Stains
5. Apply Thin Coats
If you’re using several gallons of stain for your project, first mix them together to be sure the color is consistent. Then use long, smooth strokes to stain two or three boards at once. Apply solid stains in thin coats and semitransparent stains or clear sealers in even thinner coats. This prevent puddles, which don’t soak into the wood and cause the stain to flake off when dry. Whatever type of stain you use, apply two coats to ensure there are no missed spots and to get a more uniform finish.
Wallpaper VS. Paint
The walls of our Richmond homes are the canvas to our lives. They tell a story and have the ability to change with us, as life changes. The style of our home, is the introduction to the families style and vibe.
We swap out out old photos, for updated frames and pictures. We change decor and colors as the latest trends come out. We cover up holes from old projects, wipe down stains from sticky hands and are constantly updating to show case our latest interest.
We have the unique advantage of changing and transforming the look and feel of our space with the help of a simple new paint job, color swap or wallpaper. A dramatic room can instantly be made soft and airy with the application of a light pale paint color. While a room that feels too big can instantly feel cozy with darker wallpaper or a striking pattern. Changing your decor can be such a fun and fulfilling project. But it can also be overwhelming when decided on a new color or wallpaper.
There are pros and cons of using paint vs. wallpaper. Factors to consider are ease of application, cost, and versatility to your space. Whichever you choose your walls will benefit from the addition of paint or wallpaper.
- Preparation: How long it takes to prepare a wall when deciding to paint or wallpaper needs to be taken into account. If you’re starting from a bare wall then you can skip this tip, if you have an existing finish applied to the wall read on…
o WALLPAPER: CONS: Removing existing wallpaper can be a tedious task that requires patience and the right tools to be effective. Stripping wallpaper can be done with chemicals or stripping tools, but care must be taken or damage can result to the wall. (Our Hetrick Painting Staff is highly qualified in this area and know the care that needed to be taken)
o PAINT: PROS: If you are painting over a damaged wall, prepare imperfections with spackle and let dry 24 hours in advance. Applying primer paint in advance to painting over darker color paint will make your painting preparation easier. (*Painting requires considerably less preparation time than wallpaper.)
- Selection & Durability: Both paint and wallpaper comes in unlimited varieties and colors. Paints come in various glosses and sheens, while wallpaper comes in paper and vinyl surfaces for durability and finish variation. The lifestyle of your family can make a considerable difference in which finish you select.
o WALLPAPER: PROS: Very durable and will hold up to wear and tear of children, high traffic areas and many varieties are scrubbable. CONS: Since wallpaper is applied with an adhesive, high moisture bathrooms and kitchens may cause wallpaper to peel away from the wall.
PAINT: PROS: Depending on the sheen/finish paint is a good option for areas that need to have an inexpensive and easy application. Semi-gloss to high gloss paints are durable and are usually reserved for trim, exterior doors, etc… Satin, Eggshell and occasionally Flat sheens are used on interior walls. CONS: When walls are damaged, scraped or hit, paint can chip and repairing and repainting will be necessary.
- Expense: Wallpaper and paint can range in price from the low end to the high end of the cost spectrum. Wallpaper on average is more expensive to purchase the rolls, supplies and to have it installed. Paint on average is cheaper and requires very few supplies, and an amateur can apply it. It should be noted that inexpensive wallpaper can be purchased and if you do it yourself can cut down on installation costs. Similarly with paint, higher end faux paint finishes, and textured paint can be expensive especially if it needs to be professionally applied.
- A combination of both: Many people want the versatility of adding a texture to their wall with customizable paint colors. Paintable wallpaper is a product that comes in rolls or adhesive squares. After the textured wallpaper is applied it can be left bare or it can be painted. Paintable wallpaper is the best of both worlds!
The beautiful and colorful world of wall finishes is vast and customizable! These fun home projects can transform our homes and be such a fun way to bring families together to showcase what best represents the families vibe. From historic Richmond homes, that want to keep their old fashion charm, to new developing Richmond houses that represent the latest in decor and home fashion.
Whether you choose wallpaper or paint, either one will give your home subtle or bold color and character. For the appeal of both, try paintable wallpaper or stick with paint or wallpaper. The option is yours and that’s why home decorating is so exciting!
Either way, Hetrick Painting would love to be a part of your project; With expert advice, quality care and attention to detail, We treat your home and property with respect and love.
Does the idea of do it yourself projects using paint or wallpaper terrify or excite you? Let us know!

